


Requirement: The basic requirement for this to work is to have Mozilla Firefox or Google Chrome as your browser.
Steps to achieve this: If you use Google Chrome and Mozilla Firefox users should carry out the following steps to successfully change Facebook theme.
- Open Mozilla Firefox and install 'Stylish' addon.
- Follow the basic steps to install the addon.
- Restart Firefox after successfully installing the Stylish addon.
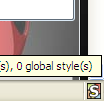
- Login to your Facebook Account and click on the small 'S' button in your Firefox status bar.
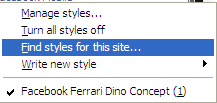
- Click on "Find Styles for this Site" to open a new tab with free themes to use for Facebook.
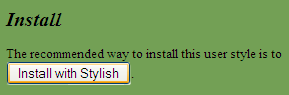
- Click on any theme and a preview will be shown.
- If everything is fine in the previewed theme, click on "Install with Stylish" button at the top right corner of the page.
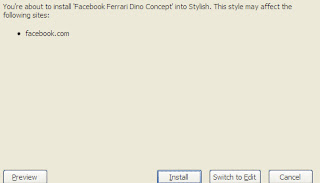
- A dialog box will open.
- Click on Install in the dialog box.
Steps for Google Chrome
- Install Stylish for Chrome from the Chrome Web Store.
- Navigate to Facebook.com and click on the S button.
- Click on "Find Styles for this Site" to open a new tab with free themes to use for Facebook.
- Click on any theme and a preview will be shown.
- If everything is fine in the previewed theme, click on "Install with Stylish" button at the top right corner of the page.
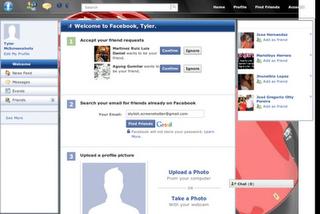
Now whenever you open Facebook, it will show the theme that you have installed with Stylish instead of the boring old blue theme.


![Use Keyboard as Mouse [How To]](https://blogger.googleusercontent.com/img/b/R29vZ2xl/AVvXsEjn3IpibwsZ0VoL-4p5PqtDFhXIudi8HgxEZebFfAg1p_P46iB5TEYLxG3hmPJ02RieK5FtBz8mu_yqm6hUJbzDw-qAbMsEwAJH5ESRjdM4Wd2Z3AmMshlhk1sAF7h4jttdT1hJjcZVe_-3/s72-c/Keyboard_Mouse.JPG "Use Keyboard as Mouse [How To]")


